Installing Windows
📺 A guide to download and install a stock Windows ISO onto a USB stick.
Preparation
Before you begin, make sure you meet the following requirements:
-
A USB drive with at least 8GB capacity
-
Backups of your important files
About Backups
This process will wipe your current system. As such, you should backup all of your important files before proceeding.
You can either use a separate partition to save your data, or you can move your data to an external drive. You could even use your installation drive, so long as it has enough storage space left. Copy your data after flashing Windows onto it.
-
Name your current Windows partition
WindowsorOSso you can easily identify it later, like on the picture below: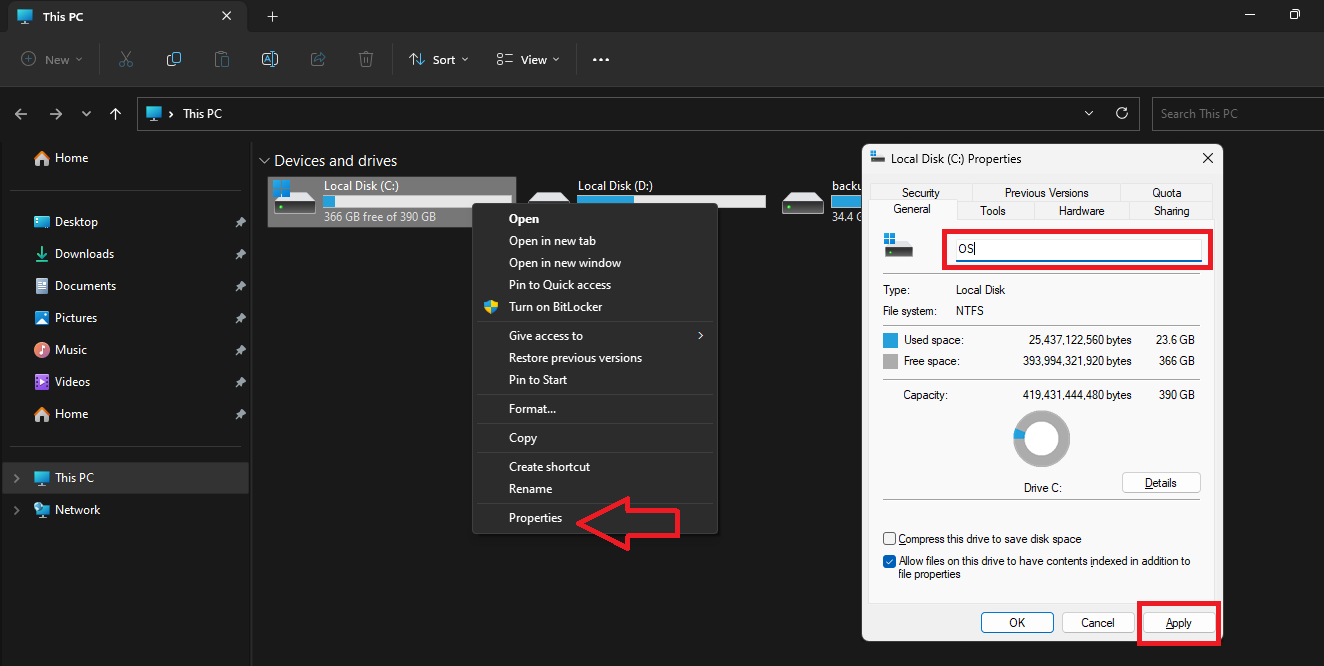
-
Prefer disabling network connection during the installation process
When something is marked with a ⭐, it is the preferred option. This option may be easier to do, safer to run or simply less complicated. Follow this unless you know what you're doing.
Downloading a Windows ISO
- MSDL ⭐
Windows 10
- Go to the official download page
- Under
Create Windows 10 installation media, selectDownload Now - Open the downloaded program and follow the instructions to download an ISO file
Windows 11
- Go to the official download page
- Scroll down to the section titled
Download Windows 11 Disk Image (ISO) for x64 devices - Select the edition, your preferred language, and click "Confirm" to proceed
- Click on the
64-bit Downloadbutton to start the download
Obtaining system information
Run the following commands in PowerShell as Administrator to gather important information about your system:
These steps should be done on the system you plan to install Windows on.
Partition Style
(Get-Disk -Number (Get-Partition -DriveLetter $env:SystemDrive.Substring(0, 1)).DiskNumber).PartitionStyle
Secure Boot status
Confirm-SecureBootUEFI
This information is important for creating your bootable USB drive.
Should you not be using Windows during this setup process, you can look up the information in your BIOS settings.
Create a bootable USB drive
Using this process will erase all data on your flash drive!
Move any important data off the stick before flashing anything on it. You can safely put it back onto the stick after flashing if you have enough free storage.
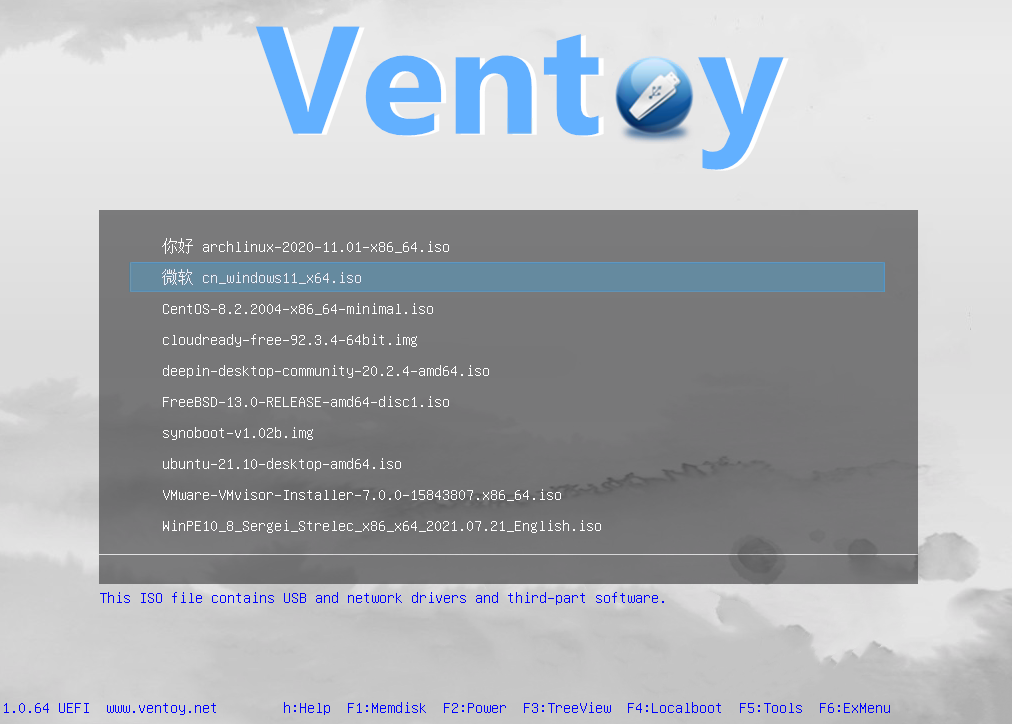
- ⭐ Ventoy
- Rufus
Ventoy is an open-source tool that allows you to create a bootable USB drive with multiple ISO files. By using Ventoy, you will be able to skip Windows 11 hardware requirements and drastically shorten the setup process without having to mess with the ISO or console commands during setup.
Setting up Ventoy
- Visit the Ventoy website to download the latest version of Ventoy for your operating system
- Extract the Ventoy zip file and run
Ventoy2Disk.exe - Create a bootable drive:
- Select your USB drive from the list of available drives
- Press "Option" and select the following:
- Secure Boot - Check here to find out if your system uses Secure Boot
- Partition Style - Check here to find out which partition style your system uses
- Click the
Installbutton to create a bootable USB drive
Apply ReviOS config
Once Ventoy is installed, it is highly recommended to apply Revision configuration for Ventoy in order to bypass Windows requirements, disable automatic drivers installation, prevent sending telemetry data, etc.
- Download the ReviOS Ventoy configuration files below
- Extract the zip file and copy everything to the root of your USB drive
- Move the downloaded Windows ISO file to the
WinISOfolder
Password is revi
⚠️〡Due to the modifications we made to security-related settings in the configuration, we were obligated to password protect the archive file. Otherwise, the file would be blocked by Google Safe Browsing and some other antivirus software.
The final directory structure should look like this:
F: (your USB drive)
│
├───ventoy
│   │───ventoy.json
│   └───revi
│       └───autounattend.xml
├───ReviSetup
│   └───setup.cmd
└───WinISO
    └───.gitkeep
    └───(your Windows ISO file here)
WIP
Boot from the USB drive
Method 1: Windows Recovery Environment (Windows only)
- Press Win + R on your keyboard to open the Run dialog
- Type
shutdown /r /t 1 /oand click OK - Wait until your computer restarts and you see the "Choose an option" screen
- Click on "Use a device"
- Select EFI USB Device or the name of your USB drive
If your USB stick or the entire boot media option is missing from this menu, continue with method 2.
Method 2: Boot Menu / BIOS
First consult the manual of your motherboard or laptop, and find out which key opens up the Boot Menu. Common keys are Esc, F2, F9, F8 F10, F11, F12, Del.
Shut down your PC completely, then boot it up again. Once your display shows any output, start rapidly pressing the boot menu key until the menu opens.
A list should come up with all of your boot options. Choose the option with the name of your flash drive.
If you selected GPT when preparing the flash drive, choose the option that boots in UEFI mode.
If you can't see the names, but only USB Drive, Optical Drive, Hard Drive or similar descriptors, choose the USB Drive as your boot option.
Changing boot order in BIOS
Alternatively, you can enter your BIOS settings and change the boot order. Your PC will try all the options in the order you set them. Therefor, if you set your USB as the first boot option, it will be preferred over all the other options, allowing you to easily boot into it.
Windows will reboot multiple times during the installation process. If you changed your boot order, and Windows does one of these reboots, you will land in the installer again.
To prevent this, after the installer reboots for the first time, set the Windows Boot Manager as your preferred boot option.
Installing
If you used Ventoy to prepare your drive, a menu will show on screen with the option to select an ISO to run. Select the desired ISO file. Unlike the picture, you will probably only have the one Windows ISO to select.
Once the Windows installer boots up, you will be greeted by the Microsoft License Terms, which you have to accept to continue the setup.
Partitions
Should the installer asks for drivers at this stage, you might need Intel Rapid Storage Technology (IRST) drivers. Here is a helping guide from the Asus Support page.
If you followed the preparation steps, your OS partition should be easily identifiable by its name.
Like on the screenshot below, select your OS partition and click Delete.
Do the same for any partitions of type System, MSR and Recovery.

There should now be an entry called Unallocated Space:

Select this Unallocated Space partition and click Next to start the installation.
When the installer is done, your PC will restart automatically. The OS will then load for a bit, with the text Getting ready on the screen, and it will restart once again.
Finishing the installation
After multiple reboots, you should finally arrive at the user creation screen.
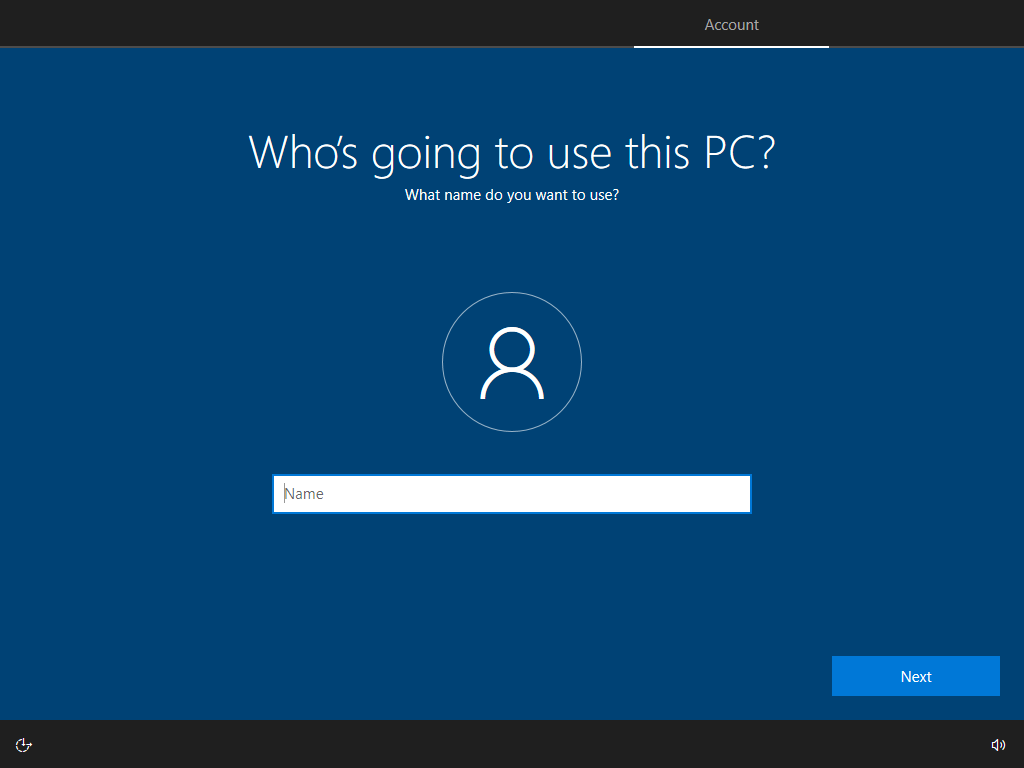
⭐ DO
- Use simple names like
UserorJohn
🚫 DON'T
- Do not use special characters like
!@#$%^&*()_+or spaces (John Doefor example). This will cause issues with some programs. - Do not user real identifiable information, such as your real name, email address, or phone number. This is a privacy concern.
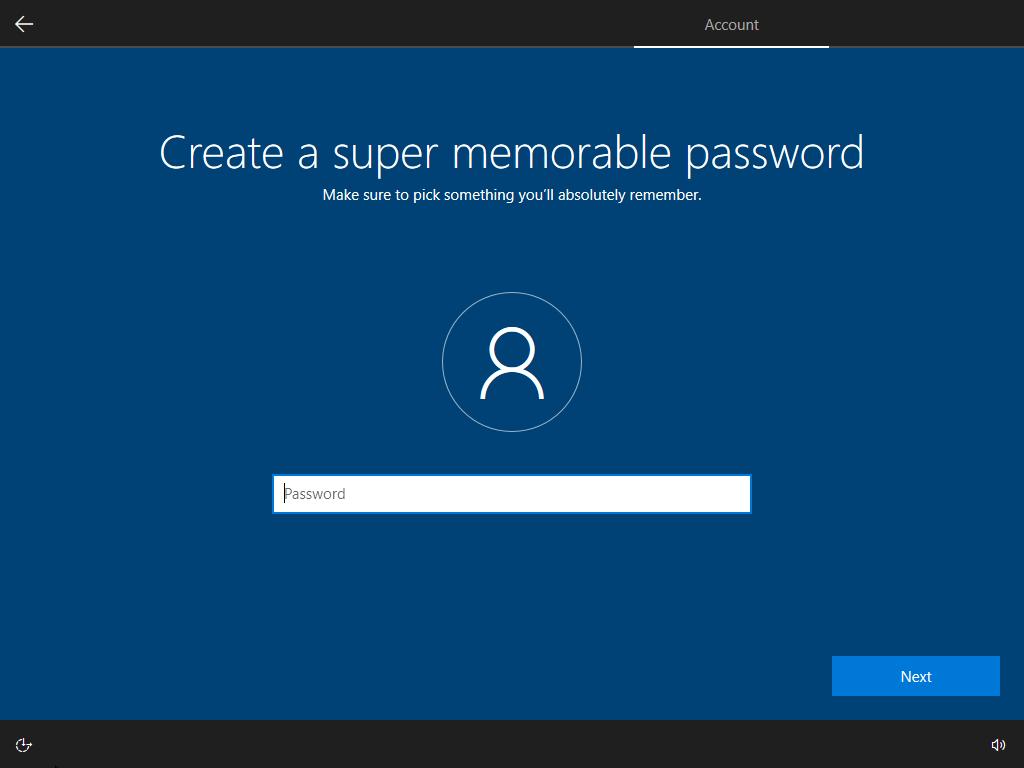
If you don't want to secure your user account with a password, feel free to leave the password field empty and directly press enter. This will also enable auto-signin with your account, though there are other ways to enable this on accounts with passwords as well.
The ReviOS Ventoy configuration already skips most privacy-related screens, but some are unskippable.
For any of these "privacy" prompts, always select the No thanks option.
This applies to both Windows 10 and 11.
Once you've made it through all the questions, you will get to a final loading scene, after which you will arrive on the desktop. Give the OS a moment to load, as a small ReviOS utility will run some short commands.
Once the command window closes, you're free to use the machine and convert your stock installation to ReviOS with the Playbook!